Basic Tart Dough
Rate this recipeBe the first to rate
 By AprilPublished
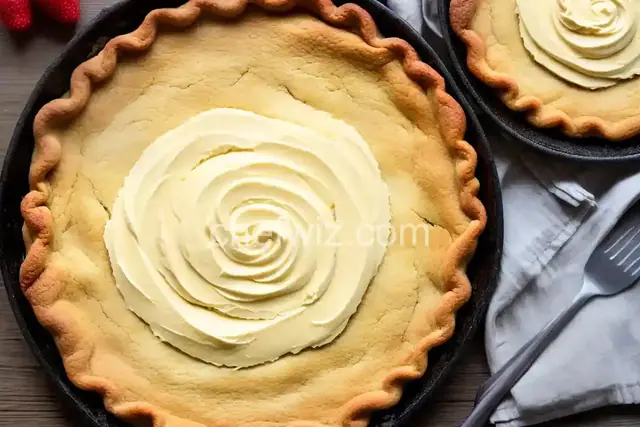
 Are you ready to master the art of making a delicious tart? Look no further!
 By AprilPublished
 Are you ready to master the art of making a delicious tart? Look no further!
In a medium bowl, combine sugar, salt, and 1 cup of flour. Whisk them together.
Add the butter to the bowl and use your fingers to rub it into the mixture. Keep doing this until the mixture looks like coarse meal with a few small pieces the size of peas remaining.
Drizzle the egg over the butter mixture and gently mix it in with a fork until the dough just starts to come together.
Transfer the dough onto a lightly floured surface and knead it until it becomes smooth. It's okay if there are a few dry spots.
Shape the dough into a disk and wrap it in plastic. Put it in the refrigerator and let it chill until it becomes firm, which usually takes at least 2 hours.
If you want to make the dough ahead of time, you can do so up to 2 days in advance. Just keep it chilled in the refrigerator or freeze it for up to 1 month.
Are you ready to master the art of making a delicious tart? Look no further! In this article, we will guide you through the process of creating a basic tart dough that will serve as the foundation for your culinary masterpiece. So, let's roll up our sleeves and get started!
Think of the tart dough as the canvas for your tart. It is the base that holds all the flavors together and provides the perfect texture. Just like a solid foundation is crucial for a building, a well-made tart dough is essential for a delectable tart.
Imagine biting into a tart with a soggy or overly crumbly crust. It would be like trying to build a house on quicksand - everything would collapse! But fear not, with our simple tart dough recipe, you'll be able to create a crust that is both flaky and sturdy.
Creating the perfect tart dough requires a delicate balance of ingredients and techniques. It's all about finding that sweet spot between flakiness and tenderness. Too much of one, and your crust will be too crumbly or tough. Too little, and it won't hold its shape.
To achieve this balance, we recommend using a combination of butter and a liquid, such as water or milk. The butter adds richness and flavor, while the liquid helps bind the dough together. Additionally, a touch of salt enhances the overall taste and balances the sweetness of the filling.
Now that we understand the importance of tart dough and the key ingredients, let's dive into the step-by-step process of making it:
Before you begin, make sure you have all the necessary ingredients at hand. You will need all-purpose flour, unsalted butter, a liquid (water or milk), salt, and a touch of sugar (optional).
Take the unsalted butter and cut it into small cubes. This will ensure that the butter is evenly distributed throughout the dough, creating pockets of flakiness.
In a mixing bowl, combine the all-purpose flour, salt, and sugar (if desired). Whisk them together until well combined.
Add the cubed butter to the dry ingredients. Using your fingertips or a pastry cutter, gently work the butter into the flour mixture until it resembles coarse crumbs. Be careful not to overmix, as this can result in a tough crust.
Slowly pour in the liquid of your choice while gently stirring the mixture with a fork. Continue mixing until the dough starts to come together. Be mindful not to overmix, as this can make the dough tough.
Transfer the dough onto a lightly floured surface. Gently knead it a few times until it forms a smooth ball. Do not overwork the dough, as this can make it tough.
Wrap the dough in plastic wrap and refrigerate it for at least 30 minutes. Chilling the dough allows the gluten to relax and prevents shrinkage during baking.
Once chilled, remove the dough from the refrigerator and let it sit at room temperature for a few minutes. This will make it easier to roll out. On a lightly floured surface, roll the dough into a circle or rectangle of your desired thickness.
Carefully transfer the rolled-out dough to a tart pan. Gently press it into the bottom and sides of the pan, ensuring there are no air pockets. Trim any excess dough hanging over the edges.
If your tart recipe calls for a pre-baked crust, you can blind bake it. To do this, place a sheet of parchment paper over the dough and fill it with pie weights or dried beans. Bake in a preheated oven for a specified time, then remove the weights and parchment paper and continue baking until the crust is golden brown.
Once your tart dough is prepared and baked (if required), it's time to fill it with your desired ingredients. Whether it's a luscious fruit filling or a savory mixture, the tart dough will provide the perfect vessel for your culinary creation. Follow the recipe instructions for the filling and baking time.
Mastering the art of making a basic tart dough is a game-changer in the world of baking. With a flaky and buttery crust, you'll be able to create endless tart variations that will wow your friends and family. Remember, practice makes perfect, so don't be discouraged if your first attempt isn't flawless. Keep experimenting and refining your skills, and soon enough, you'll be a tart-making pro!
While margarine can be used as a substitute for butter in some recipes, we recommend using unsalted butter for tart dough. Butter provides superior flavor and texture to the crust.
Absolutely! The tart dough can be prepared ahead of time and stored in the refrigerator for up to 3 days. Simply wrap it tightly in plastic wrap and let it come to room temperature before rolling it out.
Yes, you can freeze the tart dough for up to 3 months. Wrap it securely in plastic wrap and place it in a freezer bag. Thaw it in the refrigerator overnight before using.
While whole wheat flour can be used, it will result in a denser and nuttier crust. If you prefer a lighter and flak
AprilCook, recipe developer and the heart of Chefwiz. More about April