Basic High-Altitude Bread
Rate this recipeBe the first to rate
 By AprilPublished
 Have you ever wondered why baking bread at high altitudes can be such a challenge?
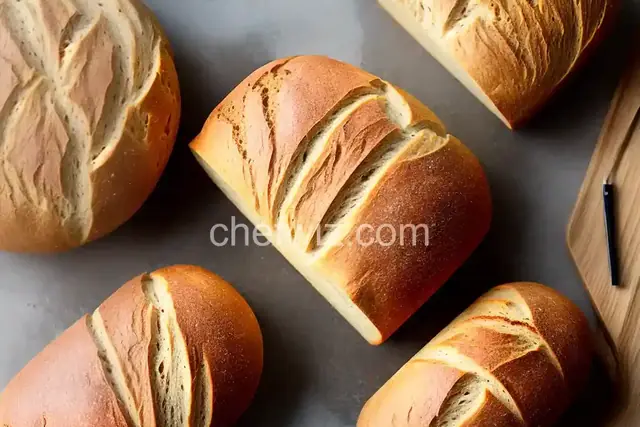 By AprilPublished
 Have you ever wondered why baking bread at high altitudes can be such a challenge?
Combine water and yeast and let it sit until it becomes foamy, approximately 10 minutes.
In a bowl, combine flour, coconut oil, sugar, salt, and the yeast mixture. Knead the mixture for about 15 minutes until it becomes silky-smooth.
Take the dough and place it in a large bowl that has been lightly oiled. Turn the dough in the bowl to coat it with oil. Cover the bowl with a towel and let the dough rise in a warm place until it doubles in volume, which usually takes about 1 hour.
Preheat the oven to 350 degrees F (175 degrees C) and grease a loaf pan.
Punch down the dough and transfer it to a lightly floured surface. Shape the dough into a loaf and place it into the greased pan. Cover the pan with a damp cloth and let the dough rise again until it doubles in volume, which usually takes about 30 minutes.
Remove the cloth and bake the dough in the preheated oven for 30 minutes for an Italian-style loaf or 45 minutes for a sandwich-style bread.
If using a bread machine, add the dry ingredients to the machine and start the dough cycle. Slowly add the coconut oil and yeast mixture.
If using a clay baker, soak the baker in water while preheating the oven. Bake the bread covered for 30 minutes, then uncover and bake for an additional
Have you ever wondered why baking bread at high altitudes can be such a challenge? The lower air pressure and drier climate can wreak havoc on your dough, leaving you with flat and dense loaves. But fear not! In this article, we will explore the secrets to baking perfect high-altitude bread. So, grab your apron and let's get started!
Baking bread at high altitudes is like climbing a mountain. Just as climbers need to adjust their gear and pace to the thin air, bakers at high altitudes need to make adjustments to their recipes and techniques. The lower air pressure affects the way yeast and gluten develop, resulting in different rise times and textures. Understanding these scientific principles will help you achieve bakery-worthy bread every time.
One of the key adjustments you need to make when baking bread at high altitudes is to the ingredients. The lower air pressure causes dough to rise more quickly, so you'll need to reduce the amount of yeast. Additionally, the drier climate means you'll need to increase the amount of water in your recipe. Finding the right balance may take some experimentation, but it's worth it for that perfect loaf of bread.
High-altitude bread baking is all about finding the right technique. Kneading the dough for a longer time helps to develop gluten, giving your bread structure and elasticity. You may also need to adjust the baking time and temperature to ensure even browning and a fully cooked interior. Don't be afraid to experiment and make adjustments until you find the perfect method for your high-altitude kitchen.
Now that you understand the science and techniques behind high-altitude bread baking, here are some additional tips to help you along the way:
High-protein flour, such as bread flour, provides the extra gluten needed to achieve a light and airy texture. Look for flour with a protein content of around 12-14% for best results.
Allowing the dough to rise twice gives it a chance to develop more flavor and structure. After the first rise, punch down the dough, shape it, and let it rise again before baking. This extra step will result in a more flavorful and well-rounded loaf.
Creating steam in the oven during the first few minutes of baking helps to keep the crust moist and allows the bread to rise to its full potential. You can achieve this by placing a tray of water on the bottom rack or spraying the oven walls with water before baking.
Baking bread at high altitudes may seem daunting, but with the right adjustments and techniques, you can achieve bakery-quality results. By understanding the science, adjusting the ingredients, and modifying the techniques, you'll be well on your way to baking the perfect high-altitude bread. So, don't let the thin air hold you back from enjoying delicious homemade bread. Happy baking!
While all-purpose flour can be used, bread flour has a higher protein content, which helps develop gluten and achieve a lighter texture.
The dough should double in size during the rising process. You can also perform the "poke test" by gently pressing your finger into the dough. If it springs back slowly, it's ready for the next step.
Absolutely! Adding nuts, seeds, or other mix-ins can add flavor and texture to your bread. Just be sure to adjust the recipe accordingly to account for any additional moisture or weight.
High-altitude bread tends to stale more quickly due to the drier climate. Store it in an airtight container or bag at room temperature for up to 2-3 days. For longer storage, you can freeze the bread and thaw it when needed.
Yes, you can use a bread machine to make high-altitude bread. Just be sure to follow the manufacturer's instructions and make any necessary adjustments to the recipe based on your altitude.
If your bread is consistently dense, try reducing the amount of yeast and increasing the amount of water in your recipe. You may also need to adjust your kneading and rising techniques to develop more gluten.
Yes, you can substitute instant yeast for active dry yeast in most bread recipes. Just keep in mind that instant yeast may require slightly different handling and rising times.
The baking time for high-altitude bread can vary depending on the recipe and your specific altitude. It's best to follow the recipe instructions and make adjustments as needed based on visual cues, such as golden brown color and a hollow sound when tapped on the bottom.
AprilCook, recipe developer and the heart of Chefwiz. More about April