Basic Cake Balls
Rate this recipeBe the first to rate
 By AprilPublished
 Are you looking for a delicious and easy-to-make treat that will impress your friends and family?
 By AprilPublished
 Are you looking for a delicious and easy-to-make treat that will impress your friends and family?
Bake the cake according to the instructions on the box using a 9-by-13-inch cake pan. Allow it to cool completely.
Once the cake has cooled, set aside enough time (at least an hour) to crumble, roll, and dip 4 dozen cake balls.
Crumble the cooled cake into a large mixing bowl. Cut the baked 9-by-13-inch cake into 4 equal sections. Remove a section from the pan, break it in half, and rub the two pieces together over a large bowl to crumble any large pieces. Use a fork to break apart any larger pieces of cake. Repeat this process for each section until the entire cake is crumbled into a fine texture. Ensure that there are no large pieces of cake.
Add three-quarters of the container of frosting to the crumbled cake. Mix it thoroughly with the back of a large metal spoon until well combined. Using the entire container of frosting will make the cake balls too moist.
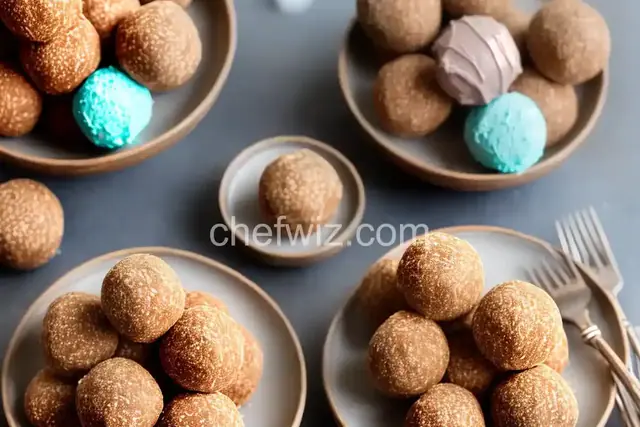
The mixture should be moist enough to roll into 1 1/2-inch balls while still holding a round shape. Roll the cake balls by hand and place them on a baking sheet covered with wax paper.
Cover the baking sheet with plastic wrap and chill the cake balls in the refrigerator for several hours or in the freezer for about 15 minutes. The balls should be firm but not frozen.
If you are making uncoated cake balls, stop
Are you looking for a delicious and easy-to-make treat that will impress your friends and family? Look no further than cake balls! These bite-sized delights are a crowd favorite and can be customized to suit any occasion. In this article, we will guide you through the process of making basic cake balls that are sure to be a hit. So, let's roll up our sleeves and get started!
The first step in making cake balls is selecting the right cake. You can use any flavor you like - chocolate, vanilla, red velvet, or even a combination. The choice is yours! Just make sure the cake is fully baked and cooled before moving on to the next step.
Once your cake is cooled, it's time to crumble it up. Break the cake into small pieces and place them in a large bowl. Then, using your hands or a fork, start crumbling the cake until it resembles fine crumbs. It's important to get the crumbs as fine as possible to ensure that the cake balls hold together.
Next, it's time to add the binding agent. Most recipes call for frosting, but you can also use cream cheese, melted chocolate, or even peanut butter. The binding agent will help the crumbs stick together and form a dough-like consistency. Add it gradually, a little at a time, until the mixture is moist enough to hold its shape when formed into a ball.
Once your cake mixture is ready, it's time to start rolling. Take a small amount of the mixture and roll it between your palms until it forms a smooth ball. Place the ball on a baking sheet lined with parchment paper and repeat the process until all the mixture is used up. Make sure to leave some space between the cake balls to prevent them from sticking together.
After you've rolled all the cake balls, it's time to chill them. Place the baking sheet in the refrigerator for at least 30 minutes to allow the cake balls to firm up. Chilling will make them easier to dip and decorate later on.
Once the cake balls are chilled, it's time to get creative with the decorations. You can dip them in melted chocolate, candy melts, or even a flavored glaze. The options are endless! Use a fork or a toothpick to dip the cake balls into the coating, making sure to tap off any excess. Place the coated cake balls back on the baking sheet and add any additional toppings or sprinkles while the coating is still wet.
After you've finished decorating the cake balls, it's important to store them properly. Place them in an airtight container and keep them refrigerated until you're ready to serve. Cake balls can be enjoyed right away or stored for up to a week. Just make sure to let them come to room temperature before serving for the best taste and texture.
Cake balls are a fun and versatile treat that can be enjoyed by people of all ages. From birthday parties to holiday gatherings, they are sure to be a hit. So why not give them a try? With just a few simple ingredients and some creativity, you can whip up a batch of delicious cake balls that will have everyone asking for more!
Absolutely! Using a store-bought cake mix can save you time and effort in the kitchen.
Yes, you can freeze cake balls. Just make sure to place them in an airtight container or freezer bag before freezing.
Cake balls can be stored in the refrigerator for up to a week, but they are best enjoyed within the first few days.
Absolutely! Feel free to experiment with different flavors of frosting to create unique cake ball combinations.
It's best to use plain cake mix without frosting already added. This will give you more control over the flavor and texture of the cake balls.
Yes, cake scraps are a great way to repurpose leftover cake and create delicious cake balls.
While a binding agent like frosting or cream cheese is typically used, you can experiment with other ingredients to achieve the desired consistency.
Absolutely! Candy melts come in a variety of flavors and colors, making them a popular choice for decorating cake balls.
AprilCook, recipe developer and the heart of Chefwiz. More about April