BA’s Best Apple Pie
Rate this recipeBe the first to rate
 By AprilPublished
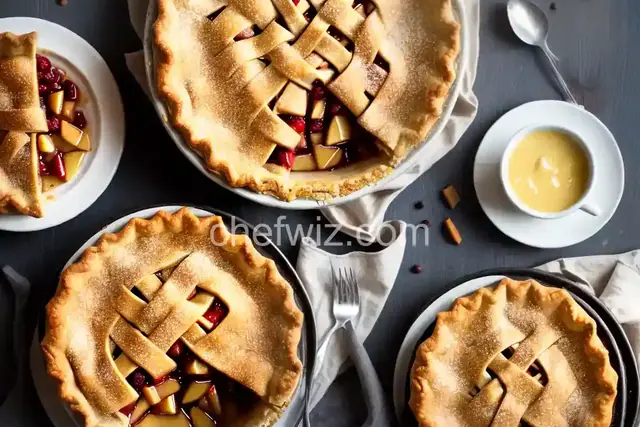
 Who doesn't love a good apple pie? The sweet aroma of cinnamon and warm apples, the buttery flaky crust that melts in your mouth, it's a dessert that brings comfort and joy.
 By AprilPublished
 Who doesn't love a good apple pie? The sweet aroma of cinnamon and warm apples, the buttery flaky crust that melts in your mouth, it's a dessert that brings comfort and joy.
In a food processor, pulse together flour, sugar, and salt until combined. Add butter and process until the largest pieces of butter are about the size of peas. Transfer the mixture to a large bowl.
In a small bowl, combine vinegar and ½ cup ice water. Drizzle this mixture over the flour mixture in the large bowl and mix with a fork until shaggy pieces form. Use your hands to knead the dough in the bowl a couple of times to bring it together (the dough will look clumpy, dry, and have loose bits). Transfer the large clumps of dough to a work surface.
Drizzle 1 tablespoon of ice water over the remaining flour mixture in the bowl and knead again to bring it together. Place this mixture on top of the dough on the work surface.
Working with half of the dough, press it into a single mass, incorporating any dry bits. Then, pat it down to make a ¾-inch thick square. Use a bench scraper or knife to divide the dough into 4 pieces. Stack these pieces on top of one another, placing any unincorporated dry bits in between the layers, and press down to combine. Form the dough into a ¾-inch thick disk and wrap it tightly in plastic. Repeat this process with the remaining dough. Chill the dough in the refrigerator for at least 2 hours.
The dough can be made ahead of time
Who doesn't love a good apple pie? The sweet aroma of cinnamon and warm apples, the buttery flaky crust that melts in your mouth, it's a dessert that brings comfort and joy. But not all apple pies are created equal. If you're looking for the best apple pie recipe to impress your family and friends, look no further than BA's Best Apple Pie.
What sets BA's Best Apple Pie apart from the rest? It's all about the details. From the selection of the apples to the technique used in creating the crust, every step is carefully thought out to achieve perfection.
Choosing the right apples is crucial for a delicious apple pie. You want apples that are firm enough to hold their shape during baking but also tender and juicy. BA's Best Apple Pie recommends a combination of Granny Smith and Honeycrisp apples for the perfect balance of tartness and sweetness.
The crust is the foundation of any good pie, and BA's Best Apple Pie crust is unparalleled. It's made with a combination of butter and shortening, resulting in a crust that is both flaky and buttery. The secret is in the technique of cutting the fats into the flour until they resemble coarse crumbs, creating layers of buttery goodness.
Now that you know the secrets behind BA's Best Apple Pie, it's time to get baking! Follow these step-by-step instructions to create a pie that will have everyone begging for seconds.
Start by peeling, coring, and slicing the apples. Toss them with sugar, cinnamon, and a squeeze of lemon juice to enhance the flavors. Let the apples sit for a while to release their natural juices.
While the apples are macerating, it's time to make the crust. Combine the flour, salt, butter, and shortening in a food processor and pulse until the mixture resembles coarse crumbs. Gradually add ice water until the dough comes together. Divide the dough in half and shape each half into a disk. Wrap in plastic wrap and refrigerate for at least an hour.
Take one of the chilled dough disks and roll it out on a lightly floured surface. Transfer it to a pie dish and trim any excess dough. Roll out the second dough disk for the top crust or create a lattice design.
Fill the prepared pie crust with the macerated apples, making sure to mound them slightly in the center. Add small pieces of butter on top of the apples for extra richness. Place the top crust or lattice over the filling, crimp the edges, and brush with an egg wash. Bake in a preheated oven until the crust is golden brown and the apples are tender.
Once the pie is out of the oven and has cooled slightly, it's time to cut into it and enjoy a slice of heaven. The combination of the tender apples and the flaky, buttery crust is simply irresistible. Serve it warm with a scoop of vanilla ice cream for the ultimate dessert experience.
BA's Best Apple Pie is the epitome of a perfect apple pie. From the carefully selected apples to the flaky, buttery crust, every element of this pie is designed to impress. So go ahead, gather your ingredients, and get ready to bake a slice of perfection. Your taste buds will thank you!
While Granny Smith and Honeycrisp apples are recommended for their flavor and texture, you can experiment with other apple varieties. Just make sure to choose apples that are suitable for baking.
Absolutely! You can prepare the crust a day or two in advance and keep it refrigerated until ready to use. Just make sure to let it come to room temperature before rolling it out.
Yes, you can freeze the assembled but unbaked pie. Wrap it tightly in plastic wrap and aluminum foil before freezing. When you're ready to bake, just thaw it in the refrigerator overnight and bake as instructed.
BA's Best Apple Pie is best enjoyed within the first two days of baking. However, if stored properly in the refrigerator, it can still be delicious for up to five days.
Definitely! You can use the same recipe to make individual-sized apple pies. Just adjust the baking time accordingly.
Absolutely! While cinnamon is the classic spice for apple pie, you can experiment with other spices like nutmeg, allspice, or even a touch of ginger to add depth of flavor.
If you're short on time or prefer the convenience of store-bought pie crust, you can certainly use it. However, the homemade crust in BA's Best Apple Pie adds a special touch that is worth the extra effort.
Absolutely! To reheat a slice of BA's Best Apple Pie, simply place it in the oven at a low temperature until warmed through. It's best to avoid using the microwave as it can make the crust soggy.
AprilCook, recipe developer and the heart of Chefwiz. More about April