Baking Powder Biscuits
Rate this recipeBe the first to rate
 By AprilPublished
 Do you ever find yourself craving a warm, flaky biscuit straight out of the oven?
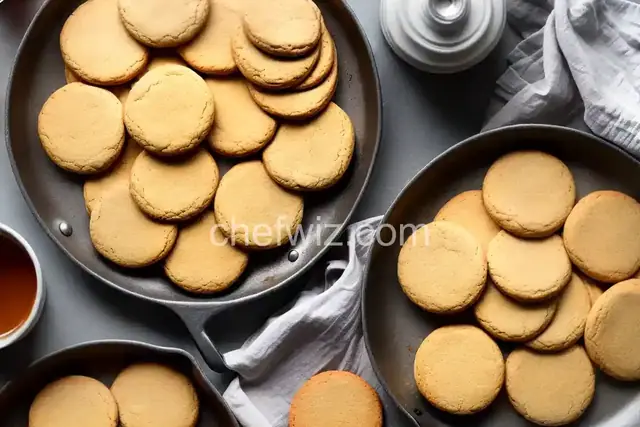 By AprilPublished
 Do you ever find yourself craving a warm, flaky biscuit straight out of the oven?
Preheat the oven to 400°F.
In a large bowl, combine the flour, baking powder, sugar, and salt.
Use a pastry blender to cut in the butter until the mixture resembles coarse crumbs.
Pour in the heavy cream and fold it into the dough using a rubber spatula until the dough just comes together.
Turn out the dough onto a lightly floured work surface and gently pat it into a 1-inch thick round.
Use a floured 2 1/4-inch round biscuit cutter to cut out the biscuits, placing them on an unlined baking sheet about 1 1/2 inches apart.
Brush the tops of the biscuits with cream.
Bake the biscuits for 20 to 25 minutes, rotating the sheet halfway through, until they are golden and flecked with brown spots.
Transfer the biscuits to a wire rack to cool.
For herb biscuits, follow the instructions for Baking Powder Biscuits and add 1/4 cup of finely chopped herbs to the flour mixture after cutting in the butter.
For sweeter biscuits, follow the instructions for Baking Powder Biscuits and increase the sugar to 1/2 cup and reduce the butter to 3/4 cup.
Pat the dough to about 1 1/4 inches thick before cutting out rounds. Brush the rounds with a beaten egg and sprinkle with sanding
Do you ever find yourself craving a warm, flaky biscuit straight out of the oven? The kind that melts in your mouth and pairs perfectly with a dollop of butter or a drizzle of honey? If so, you're in luck! In this article, we're going to dive into the world of baking powder biscuits and uncover the secrets to creating these irresistible treats.
Before we get into the specifics of making baking powder biscuits, let's take a moment to appreciate the magic of baking powder. This humble ingredient is what gives our biscuits their light and fluffy texture. When mixed with the other dry ingredients and combined with a liquid, baking powder creates tiny bubbles of carbon dioxide. These bubbles expand during baking, causing the biscuits to rise and become tender.
Now that we understand the role of baking powder, let's talk about the perfect ratio of ingredients for baking powder biscuits. The general rule of thumb is to use 1 to 2 teaspoons of baking powder for every cup of flour. This ensures just the right amount of leavening power to achieve that desired fluffiness.
When it comes to choosing the right flour for your biscuits, all-purpose flour is the way to go. Its moderate protein content strikes a perfect balance between tenderness and structure. If you prefer a slightly denser biscuit, you can opt for self-rising flour, which already contains baking powder and salt.
Now that we have our ingredients, it's time to mix and knead the dough. It's important not to overmix the dough, as this can result in tough biscuits. Instead, gently combine the ingredients until just combined. A light touch is key here.
Once the dough is mixed, it's time to shape the biscuits. Dust your work surface with flour and pat the dough into a rectangle. Using a sharp biscuit cutter, cut out the biscuits and place them on a baking sheet. For an extra touch of flakiness, you can brush the tops of the biscuits with melted butter before baking.
Preheat your oven to the recommended temperature and bake the biscuits until they are golden brown and cooked through. The exact baking time will depend on the size and thickness of your biscuits, but a good rule of thumb is around 12 to 15 minutes.
No, baking soda is not a direct substitute for baking powder. Baking soda requires an acid to activate, whereas baking powder already contains an acid. Using the wrong leavening agent can affect the texture and taste of your biscuits.
Absolutely! There are many gluten-free flour blends available that can be used as a substitute for all-purpose flour. Just make sure to choose a gluten-free baking powder as well.
Yes, you can freeze the unbaked biscuit dough for later use. Simply shape the dough into biscuits, place them on a baking sheet, and freeze until firm. Then transfer the frozen biscuits to a freezer bag or container. They can be baked straight from the freezer, just add a few extra minutes to the baking time.
Absolutely! Adding herbs or cheese to your biscuit dough can elevate the flavor and add a delicious twist. Just make sure to adjust the amount of liquid in the recipe, as the additional ingredients may affect the dough's consistency.
Of course! While traditional biscuits are round, there's no rule saying you can't get creative with your biscuit shapes. Feel free to use heart-shaped or square biscuit cutters for a fun and unique twist.
Definitely! You can adjust the size of your biscuits to suit your preferences. Just keep in mind that smaller biscuits will require less baking time, while larger biscuits may need a few extra minutes in the oven.
While butter is the classic choice for biscuits, you can experiment with different fats like shortening or lard. Just keep in mind that the flavor and texture may be slightly different.
Freshly baked biscuits will stay fresh for 1 to 2 days if stored in an airtight container at room temperature. If you want to prolong their freshness, you can freeze the baked biscuits and reheat them in the oven when ready to enjoy.
In conclusion, baking powder biscuits are a delightful treat that can be enjoyed any time of day. With the right ingredients and techniques, you can achieve fluffy, flavorful biscuits that will leave you craving more. So why not roll up your sleeves, preheat that oven, and embark on a biscuit-making adventure?
AprilCook, recipe developer and the heart of Chefwiz. More about April