Backyard Baby Back Ribs
Rate this recipeBe the first to rate
 By AprilPublished
 When it comes to summer barbecues, nothing quite beats the mouthwatering aroma of sizzling ribs on the grill.
 By AprilPublished
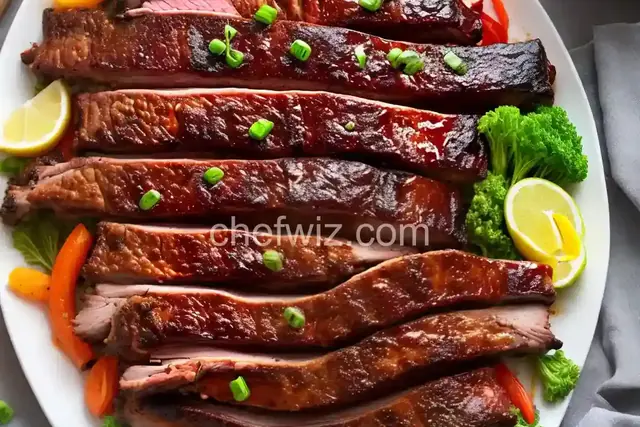
 When it comes to summer barbecues, nothing quite beats the mouthwatering aroma of sizzling ribs on the grill.
Start by placing each rib rack on a sheet of heavy-duty aluminum foil that is wider and longer than the ribs.
Season the racks with kosher salt and sprinkle 3 tablespoons of the rub on each rack.
Flip the ribs, so the meat side is facing down, and tightly seal each foil pouch.
Put the foil pouches on a half sheet pan and refrigerate them overnight.
The next day, preheat the oven to 250 degrees F.
Mix the orange juice and margarita mix in a liquid measuring cup.
Open one end of each pouch and evenly pour the liquid mixture into the pouches.
Reseal the pouches and place the sheet pan in the oven for 2 hours.
Take the ribs out of the oven, carefully open one end of each pouch, and pour the braising liquid into a heatproof measuring cup.
Reseal the pouches and refrigerate them along with the measuring cup of liquid for up to 8 hours.
Remove the solidified fat from the top of the braising liquid.
Transfer the liquid to a small saucepan and add honey, ketchup, Worcestershire sauce, espresso powder, and cayenne pepper.
Whisk the ingredients together and set the saucepan over medium-high heat.
Reduce the mixture to a glaze
When it comes to summer barbecues, nothing quite beats the mouthwatering aroma of sizzling ribs on the grill. Whether you're hosting a backyard get-together or simply indulging in some quality family time, baby back ribs are a crowd-pleasing favorite. In this article, we'll explore the art of preparing and grilling backyard baby back ribs to perfection.
Before we dive into the cooking process, it's essential to select the right ribs. Baby back ribs are known for their tenderness and delicious flavor. Look for ribs that have a good amount of meat on the bones and are evenly marbled. The meat should be firm to the touch and not slimy or discolored.
Now that you have your ribs, it's time to prepare them for the grill. Start by removing the membrane from the back of the ribs. This thin layer can prevent the flavors from penetrating the meat. Gently slide a butter knife under the membrane and peel it off using a paper towel for a better grip.
Marinating the ribs is essential for infusing them with flavor. You can use a store-bought marinade or create your own using a combination of spices, herbs, and sauces. Let the ribs marinate for at least a few hours or overnight in the refrigerator. This allows the flavors to meld together and tenderize the meat.
Grilling ribs requires patience and skill. The goal is to achieve a tender, smoky, and slightly charred exterior while keeping the meat juicy and succulent on the inside. Here are a few grilling techniques to master:
Using the indirect heat method is ideal for slow-cooking ribs. This technique involves setting up your grill with two zones: one for direct heat and one for indirect heat. Place the ribs on the indirect heat side and close the lid. This allows the ribs to cook slowly, ensuring they are tender and evenly cooked.
When it comes to grilling ribs, a low and slow approach is key. Maintaining a consistent low temperature (around 225-250°F) for a longer cooking time allows the flavors to develop and the meat to become tender. This method ensures the ribs are not undercooked or overcooked.
No backyard baby back rib experience is complete without a delicious sauce or glaze. Brush the ribs with your favorite barbecue sauce during the last 30 minutes of cooking. This adds a sticky and caramelized layer of flavor to the ribs. Remember to baste and flip the ribs occasionally to prevent burning.
After the ribs are cooked to perfection, it's essential to let them rest for a few minutes before serving. This allows the juices to redistribute throughout the meat, resulting in a more flavorful and tender bite. Use a sharp knife to separate the ribs and serve them with your favorite sides and sauces.
Backyard baby back ribs are a true delight for any barbecue enthusiast. With the right preparation, grilling techniques, and a touch of your favorite sauce, you can create a memorable dining experience for friends and family. So fire up the grill, gather your loved ones, and indulge in the finger-licking goodness of perfectly grilled baby back ribs.
Grilling baby back ribs typically takes around 2-3 hours, depending on the temperature and thickness of the ribs. It's important to cook them low and slow for tender and flavorful results.
Absolutely! You can achieve great results using a gas grill. Just make sure to set it up for indirect heat and maintain a consistent temperature throughout the cooking process.
There are endless possibilities when it comes to rubs and marinades. Experiment with different combinations of spices, herbs, and sauces to create your own unique flavor profile. Some popular options include honey mustard, garlic and herb, and Asian-inspired marinades.
While parboiling can help speed up the cooking process, it may result in less tender ribs. Slow-cooking the ribs on the grill allows them to develop a smoky flavor and tender texture that cannot be achieved through boiling alone.
To prevent dry ribs, make sure to marinate them before grilling and baste them with sauce during the cooking process. Additionally, using the indirect heat method and maintaining a consistent temperature will help retain moisture and prevent drying.
Yes, you can freeze leftover ribs for future enjoyment. Wrap them tightly in aluminum foil or place them in an airtight container before freezing. When ready to enjoy, thaw them in the refrigerator and reheat them on the grill or in the oven.
No, baby back ribs and spare ribs come from different parts of the pig. Baby back ribs are shorter and leaner, while spare ribs are larger and meatier. Both have their own unique flavor and texture.
Absolutely! If you don't have access to a grill, you can still enjoy delicious baby back ribs by cooking them in the oven. Simply follow a similar low and slow cooking method, and finish them off under the broiler for a caramelized glaze.
AprilCook, recipe developer and the heart of Chefwiz. More about April