Apple Tarte Tatin
Rate this recipeBe the first to rate
 By AprilPublished
 Have you ever wanted to impress your guests with a mouthwatering dessert that looks like it came straight from a fancy bakery?
 By AprilPublished
 Have you ever wanted to impress your guests with a mouthwatering dessert that looks like it came straight from a fancy bakery?
Preheat the oven to 425 degrees F (220 degrees C).
Use butter to coat a 10-inch oven-proof skillet. Sprinkle sugar evenly over the butter.
Arrange the apple quarters, rounded sides down, in a circular pattern on top of the butter and sugar.
Put the skillet on medium-high heat and cook until the butter melts and the sugar dissolves and starts to caramelize. Keep cooking until the apples become soft and the caramel starts to brown, which should take around 10 to 12 minutes. Remove from heat.
Sprinkle some flour on a work surface and roll out the pie dough into an 11-inch circle. Pinch the edge to create a ruffle around the crust.
Place the crust on top of the apples and tuck in the edges around the apples.
Bake in the preheated oven until the crust turns golden brown, which should take about 20 minutes. Allow it to cool for 5 minutes.
Place a plate over the top of the pan and carefully invert it to release the tarte from the pan. Scrape any remaining apples stuck to the pan back on top of the crust.
Have you ever wanted to impress your guests with a mouthwatering dessert that looks like it came straight from a fancy bakery? Look no further than the Apple Tarte Tatin! This delectable treat is not only visually stunning but also incredibly delicious. In this article, we will explore the origins of this French dessert, unravel the secrets to making the perfect Tarte Tatin, and answer some frequently asked questions along the way. Get ready to indulge your taste buds!
Legend has it that the Tarte Tatin was born out of a culinary mishap. The Tatin sisters, who ran a hotel in France during the 19th century, accidentally overcooked their apples while attempting to make a traditional apple pie. Instead of discarding the caramelized apples, they decided to cover them with pastry and bake them. The result? A caramelized and perfectly caramelized apple tart that became an instant hit.
Creating a flawless Apple Tarte Tatin may seem daunting, but with a little knowledge and practice, anyone can master it. Here are a few tips and tricks to ensure your Tarte Tatin turns out impeccably:
When it comes to making a Tarte Tatin, not all apples are created equal. You'll want to choose apples that hold their shape well during baking and have a balance of sweetness and tartness. Granny Smith, Honeycrisp, or Braeburn apples are excellent choices.
The key to a delicious Tarte Tatin lies in perfectly caramelizing the apples. Make sure to cook the apples in butter and sugar until they turn a beautiful golden brown color. This caramelization process adds depth and richness to the flavor profile of the tart.
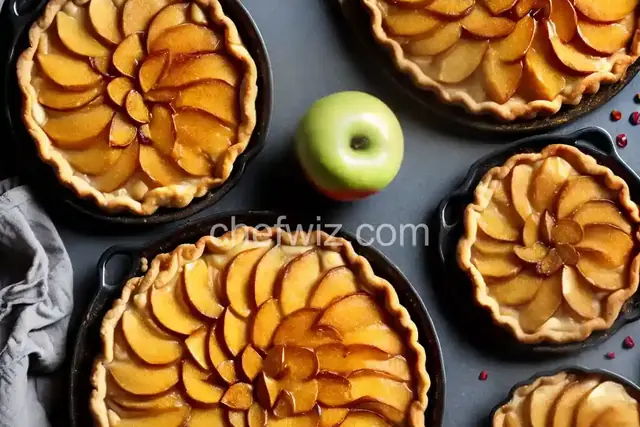
The most nerve-wracking step of making a Tarte Tatin is the flip. After baking the tart, you'll need to carefully invert it onto a serving plate. To do this successfully, place the plate on top of the pan, hold your breath, and quickly flip it. The apples should release from the pan, revealing a picture-perfect caramelized top.
The Apple Tarte Tatin is a true showstopper that will impress even the most discerning dessert connoisseur. With its caramelized apples, buttery pastry, and irresistible flavors, it's a dessert that will leave your guests in awe. So, why not give it a try and indulge in a slice of heaven?
Absolutely! While a traditional Tarte Tatin is made with pie crust, using puff pastry adds an extra layer of flakiness and buttery goodness.
Yes, you can. Prepare the Tarte Tatin as usual and let it cool completely before refrigerating. When you're ready to serve, gently reheat it in the oven for a few minutes to bring back that fresh-out-of-the-oven taste.
Absolutely! While the traditional Tarte Tatin features apples, you can experiment with other fruits such as pears, peaches, or even pineapple. Just make sure to adjust the cooking time accordingly as different fruits may require different baking times.
Of course! Mini Tarte Tatins make for adorable individual desserts that are perfect for dinner parties or special occasions. Simply divide the ingredients and bake the mini tarts in ramekins.
While a non-stick pan may seem like a good idea, it's best to use a cast-iron skillet or a heavy-bottomed stainless steel pan for making a Tarte Tatin. These types of pans distribute heat more evenly, resulting in better caramelization.
Yes, you can freeze a Tarte Tatin. After baking and cooling, wrap it securely in plastic wrap and aluminum foil before placing it in the freezer. When you're ready to enjoy it, let it thaw in the refrigerator overnight and reheat it in the oven before serving.
Absolutely! Tarte Tatin pairs wonderfully with a scoop of vanilla ice cream or a dollop of freshly whipped cream. The combination of warm caramelized apples and cold creamy goodness is simply divine.
While butter adds richness and flavor to the Tarte Tatin, you can substitute it with a non-dairy alternative such as margarine or coconut oil for a vegan-friendly version.
AprilCook, recipe developer and the heart of Chefwiz. More about April