Apple Pie Bars
Rate this recipeBe the first to rate
 By AprilPublished
 Who doesn't love the warm and comforting flavors of apple pie?
 By AprilPublished
 Who doesn't love the warm and comforting flavors of apple pie?
Preheat the oven to 350°F and prepare a 9x13 pan by lining it with parchment paper and greasing it with cooking spray.
In a large bowl, use a hand mixer to beat the butter and sugars together until they become light and fluffy.
Add the flour and salt to the bowl and mix until the ingredients are just combined.
Press the mixture into the prepared pan, making sure to cover about half an inch up the sides.
Bake the crust until it turns lightly golden, which should take around 20 minutes.
In another large bowl, toss together the apples, lemon juice, brown sugar, cinnamon, vanilla, and salt.
Spread the apple mixture over the baked crust.
In a medium bowl, whisk together the flour, pecans, brown sugar, and salt.
Stir in the melted butter until coarse clumps begin to form.
Sprinkle the crumb topping evenly over the apples.
Bake the dessert until the top turns golden and the apples become soft, which should take about 1 hour.
Allow the dessert to cool for at least 15 minutes before slicing it into squares.
Finally, drizzle caramel over the squares before serving.
Who doesn't love the warm and comforting flavors of apple pie? The sweet aroma of cinnamon and apples wafting through the house, the buttery crust, and the gooey filling - it's a dessert that brings back memories and soothes the soul. But what if you could enjoy all that goodness in a more convenient and portable form? Enter apple pie bars, the perfect treat for when you want all the deliciousness of apple pie without the fuss.
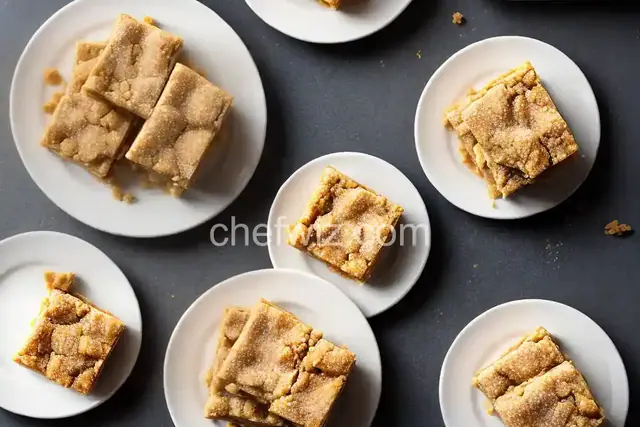
Apple pie bars are like the cool cousin of apple pie. They take all the flavors and textures you love and transform them into a handheld delight. With a buttery crust on the bottom and top, and a luscious apple filling in between, these bars are a mouthwatering treat that can be enjoyed any time of the day.
One of the great things about apple pie bars is their versatility. They can be served as a dessert, a snack, or even a breakfast treat. Imagine starting your day with a warm apple pie bar and a cup of coffee - pure bliss! And because they are so easy to make, you can whip up a batch whenever the craving strikes.
Making apple pie bars is a lot like making a traditional apple pie, but with a few key differences. Instead of rolling out a pie crust and fitting it into a pie dish, you'll need to prepare a crust that can be pressed into a baking pan. This makes the bars sturdier and easier to eat on the go.
The filling for apple pie bars is similar to that of a traditional apple pie. You'll need fresh apples, sugar, cinnamon, and a touch of lemon juice to bring out the flavors. Once the crust is prepared and the filling is made, simply layer the two together and bake until golden brown and bubbly.
Want to take your apple pie bars to the next level? Here are a few tips and tricks to ensure a perfect batch every time:
1. Can I use store-bought pie crust for apple pie bars?
Yes, you can definitely use store-bought pie crust to save time. Just make sure to follow the instructions on the package for pre-baking or par-baking the crust before adding the filling.
2. Can I freeze apple pie bars?
Absolutely! Apple pie bars freeze well and can be stored in the freezer for up to 3 months. Simply wrap them tightly in plastic wrap or aluminum foil, and thaw at room temperature when ready to enjoy.
3. Can I use a different fruit for the filling?
While apple is the classic choice for pie bars, you can certainly experiment with other fruits like peaches, berries, or even a combination of fruits. Just make sure to adjust the sugar and spices accordingly to complement the flavors.
4. Can I make apple pie bars ahead of time?
Yes, apple pie bars can be made ahead of time and stored in an airtight container at room temperature for up to 3 days. They also taste great when reheated in the oven for a few minutes to restore their freshness.
5. Can I add nuts to the apple pie bars?
Absolutely! Chopped walnuts or pecans make a delicious addition to apple pie bars. Just sprinkle them over the filling before adding the top crust.
6. Can I use a different size of baking pan?
Absolutely! Apple pie bars can be made in different sizes of baking pans, depending on your preference. Just keep in mind that the baking time may vary, so adjust accordingly.
7. Can I use gluten-free flour for the crust?
Yes, you can use gluten-free flour to make a gluten-free version of apple pie bars. Just make sure to use a gluten-free pie crust recipe or a gluten-free flour blend that is suitable for baking.
8. Can I add spices like nutmeg or cloves to the filling?
Absolutely! Spices like nutmeg, cloves, or even a pinch of ginger can add a wonderful depth of flavor to the apple pie filling. Experiment with different combinations to find your favorite.
Apple pie bars are a delightful twist on a classic dessert. They offer all the flavors and textures of apple pie in a convenient and portable form. Whether enjoyed as a dessert, snack, or breakfast treat, these bars are sure to satisfy your sweet tooth. With a few simple tricks and tips, you can elevate your apple pie bars to a whole new level of deliciousness. So go ahead, grab a warm apple pie bar and savor the sweet taste of homemade goodness.
AprilCook, recipe developer and the heart of Chefwiz. More about April