Almost-Famous Cinnamon Buns
Rate this recipeBe the first to rate
 By AprilPublished
 Who doesn't love the smell of freshly baked cinnamon buns wafting through the air?
 By AprilPublished
 Who doesn't love the smell of freshly baked cinnamon buns wafting through the air?
Prepare the dough: Gently heat the milk in a saucepan on low heat until it reaches around 100 degrees. Remove from heat and sprinkle yeast and 1/4 teaspoon of sugar over the milk (do not stir). Set aside for 5 minutes until it becomes foamy. Whisk in melted butter, egg yolk, and vanilla.
In the bowl of a stand mixer, whisk together flour, remaining 1/4 cup sugar, salt, and nutmeg. Create a well in the center and pour in the yeast mixture. Mix on low speed using the dough hook until the mixture becomes thick and slightly sticky. Knead on medium speed until the dough gathers around the hook, approximately 6 minutes. If needed, add up to 2 more tablespoons of flour.
Remove the dough from the mixer and shape it into a ball. Butter the mixer bowl and return the dough to the bowl, turning it to coat it with butter. Cover the bowl with plastic wrap and let the dough rise until doubled in size, approximately 1 hour and 15 minutes.
Roll out the dough and fill it with desired ingredients. Cut the dough into buns. Butter a 9-by-13-inch baking pan and place the buns in the pan, with the cut side facing down and leaving space between each bun. Cover the pan with plastic wrap and let the buns rise until doubled in size, approximately 40 minutes. Preheat the
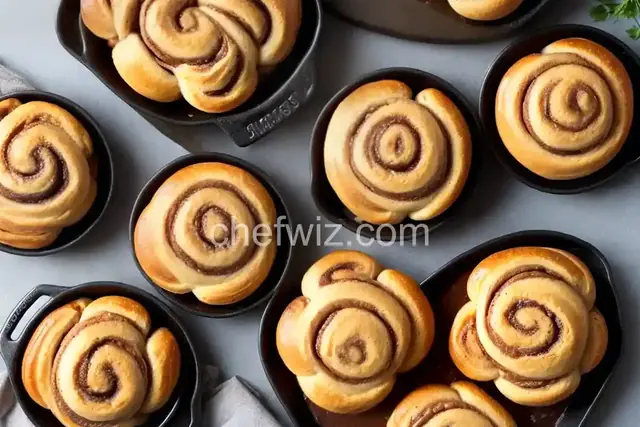
Who doesn't love the smell of freshly baked cinnamon buns wafting through the air? These mouth-watering treats are a staple in many households, and for a good reason. With their soft, fluffy dough and sweet, gooey cinnamon filling, they are the ultimate comfort food. In this article, we will dive deep into the world of cinnamon buns, exploring their history, sharing tips and tricks for making them at home, and answering some frequently asked questions along the way.
Did you know that cinnamon buns have been around for centuries? This beloved pastry has a rich history, with its roots dating back to ancient Egypt. The Egyptians were known to incorporate cinnamon in their bread, creating a precursor to the modern-day cinnamon bun.
Over time, cinnamon buns made their way to Europe and became a popular treat during special occasions and festivals. The sweet aroma and delicious taste of these buns quickly won the hearts of people, and they began to appear in bakeries and cafes across the continent.
Now that we know a bit about the history of cinnamon buns, let's talk about how you can make your own almost-famous cinnamon buns at home. The secret to a perfect cinnamon bun lies in the dough. It should be soft, yet elastic, allowing the buns to rise beautifully in the oven. When it comes to the filling, a generous amount of cinnamon, sugar, and butter is the key to achieving that irresistible gooeyness.
To make the dough, start by mixing together flour, sugar, yeast, and salt in a large bowl. In a separate bowl, combine warm milk, melted butter, and an egg. Gradually add the wet ingredients to the dry ingredients, mixing until a smooth dough forms. Knead the dough for a few minutes until it becomes elastic, then let it rise in a warm place for about an hour.
Once the dough has doubled in size, roll it out into a rectangle on a floured surface. Spread a generous amount of softened butter over the dough, followed by a mixture of cinnamon and sugar. Starting from one of the longer sides, tightly roll the dough into a log. Cut the log into equal-sized pieces and place them in a greased baking dish. Let the buns rise for another 30 minutes, then bake them in a preheated oven until golden brown.
Making cinnamon buns can be a bit tricky, especially if you're new to baking. But fear not, we've got you covered with some helpful tips to ensure your cinnamon buns turn out absolutely heavenly.
Firstly, make sure your yeast is fresh and active. If it's expired or not properly activated, your dough won't rise as it should. Secondly, don't be tempted to add too much flour while kneading the dough. It should be slightly sticky but still manageable. Lastly, be generous with the cinnamon-sugar filling. The more, the merrier!
Cinnamon buns are a timeless classic that never fails to bring joy and comfort. Whether you're a seasoned baker or a beginner, making your own almost-famous cinnamon buns is a rewarding and delicious experience. So roll up your sleeves, gather your ingredients, and get ready to indulge in the sweet, cinnamon-filled goodness of these delightful treats!
Yes, you can freeze cinnamon buns. After baking them, let them cool completely, then place them in an airtight container or freezer bag. When you're ready to enjoy them, simply thaw them at room temperature or warm them up in the oven for a few minutes.
Absolutely! If you're looking for a healthier option, you can use coconut sugar, honey, or maple syrup instead of regular granulated sugar. These alternatives will give your cinnamon buns a unique flavor profile.
Of course! Adding chopped nuts or raisins to the filling is a great way to add some texture and extra flavor to your cinnamon buns. Simply sprinkle them over the cinnamon-sugar mixture before rolling up the dough.
Cinnamon buns are best enjoyed fresh out of the oven when they are still warm and gooey. However, if stored in an airtight container at room temperature, they can stay fresh for up to 2-3 days. You can also reheat them in the microwave for a few seconds to bring back that fresh-baked taste.
While yeast is traditionally used to make cinnamon buns, you can make a quick version using baking powder instead. The dough won't have the same rise and texture as yeast-based buns, but they will still be delicious.
Absolutely! Using a bread machine can make the process of making cinnamon buns even easier. Simply add the ingredients to the machine according to the manufacturer's instructions, select the dough setting, and let the machine do the work for you.
Yes, you can! If you prefer bite-sized treats, simply roll out the dough into a smaller rectangle and cut it into smaller pieces. Bake them in a muffin tin for perfectly portioned mini cinnamon buns.
While butter adds richness and flavor to cinnamon buns, you can substitute it with margarine or coconut oil if you prefer. Just keep in mind that the taste and texture might be slightly different.
Yes, you can make gluten-free cinnamon buns using a gluten-free flour blend. Look for a blend that is specifically designed for baking and follow the same recipe, making sure to adjust the measurements if necessary.
AprilCook, recipe developer and the heart of Chefwiz. More about April