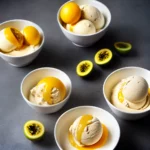
Hey there, ice cream lovers! Craving a delicious homemade treat? Look no further! I’m here to share a super easy and fun way to make ice cream right in your blender. Say goodbye to store-bought options and hello to creamy, dreamy goodness made with love.
So, how do you make ice cream in a blender? It’s as simple as 1, 2, 3! With just a few ingredients and a trusty blender, you’ll be whipping up your favorite flavors in no time. No fancy equipment needed, no churn required.
I’ve personally tested different methods and found that making ice cream in a blender yields results that are oh-so-close to using an ice cream maker. Plus, it’s much more affordable! You can use any homemade ice cream recipe you like and adapt it to this blender-friendly technique.
Why make your own ice cream, you ask? Well, for starters, it’s cost-effective. You’ll be saving some serious dough compared to buying pints from the store. And let’s not forget the taste! Homemade ice cream allows you to control the ingredients and create flavors that are perfectly tailored to your preferences.
Key Takeaways:
- Create creamy, homemade ice cream in a blender without the need for an ice cream machine.
- Adapt any homemade ice cream recipe to the blender method for convenience and cost savings.
- Enjoy the delicious taste and customization options of homemade ice cream.
- Experiment with different flavors and mix-ins to create your own unique creations.
- Share your homemade ice cream journey and tag me on Instagram!
How to Make Ice Cream from Scratch without a Machine
For those without an ice cream machine, making homemade ice cream can seem like a daunting task. But fear not! With just a few simple steps and the help of a blender, you can create delicious ice cream from scratch right in your own kitchen. So put away those store-bought pints and let’s dive into the world of homemade frozen desserts!
To start, you’ll need to make an ice cream base. This can be as simple as combining your favorite ingredients, such as heavy cream, sugar, and vanilla extract. Once your base is ready, pour it into an ice cube tray and freeze it overnight. The next day, transfer the frozen ice cream cubes to your blender and blend until smooth and creamy. If needed, add a splash of plant-based milk to achieve your desired consistency.
Beginners can start with a basic recipe, like a classic vanilla ice cream, and then unleash their creativity by experimenting with different flavors and mix-ins. The blender method offers endless possibilities for customization, allowing you to create unique combinations like chocolate chip cookie dough, strawberry cheesecake, or even mint chocolate chip.
| Benefits of Making Ice Cream in a Blender |
|---|
| No need for an ice cream machine |
| Quick and easy process |
| Can be done with any homemade ice cream recipe |
| Yields creamy and smooth ice cream |
| Versatile for experimenting with flavors and mix-ins |
So why use a blender to make homemade ice cream? Well, for starters, it eliminates the need for an expensive ice cream machine. This makes the process more accessible and budget-friendly. The blender method also creates no-churn ice cream, meaning you don’t have to go through the extra step of churning the ice cream base. This saves you time and effort, while still yielding a creamy and luscious texture.
Whether you’re a beginner or a seasoned ice cream enthusiast, the blender method is a fantastic way to enjoy homemade frozen desserts. So grab your favorite ingredients, fire up your blender, and get ready to indulge in the creamy goodness of homemade ice cream!
Why Use a Blender to Make Homemade Ice Cream
Blender-friendly ice cream is a game-changer for homemade frozen desserts. When it comes to creating creamy homemade ice cream without the need for an ice cream machine, the blender method is the way to go. With its no-churn technique, a blender can transform simple ingredients into a luscious and smooth treat that rivals any store-bought option.
One of the key advantages of using a blender for making ice cream is its accessibility. Not everyone has an ice cream machine, but almost everyone has a blender in their kitchen. By harnessing the power of this versatile appliance, anyone can whip up a batch of delicious ice cream. Plus, with the blender method, there’s no need to churn the ice cream base, saving time and effort.
But perhaps the most enticing aspect of blender-made ice cream is its ability to produce a creamy texture. The high-speed blending action of the blender helps break down ice crystals, resulting in a smoother and creamier consistency. Whether it’s a classic vanilla or an indulgent chocolate, the blender method ensures that each spoonful of homemade ice cream is velvety and satisfying.
Table: Advantages of Blender-Friendly Ice Cream
| Advantages | |
|---|---|
| No need for an ice cream machine | |
| No-churn method | |
| Creates creamy and smooth texture | |
| Accessible for home cooks | |
| Versatile and customizable flavors |
The blender-friendly ice cream method opens up a world of possibilities for homemade frozen desserts. It allows home cooks to experiment with various flavors, mix-ins, and toppings to create their own signature creations. With a blender in hand, the possibilities are limitless, and the satisfaction of enjoying a bowl of creamy homemade ice cream is just a blend away.
Step-by-Step Guide to Making Ice Cream in a Blender
Have you ever wanted to make homemade ice cream but don’t have an ice cream maker? Well, I have good news for you! With just a blender and a few simple ingredients, you can whip up delicious homemade ice cream in no time. In this step-by-step guide, I’ll walk you through the process of making ice cream in a blender, from preparing the ice cream base to achieving the perfect creamy texture.
Step 1: Prepare the Ice Cream Base
The first step in making ice cream in a blender is to prepare the ice cream base. This can be done by following your favorite ice cream recipe, whether it’s a classic vanilla or a decadent chocolate. Combine all the ingredients in a blender and blend until smooth and well mixed.
Step 2: Freeze the Ice Cream Base
Once the ice cream base is ready, pour it into an ice cube tray and place it in the freezer. Allow the ice cream base to freeze overnight or until solid. Freezing the base in ice cube form will make it easier to blend later on.
Step 3: Blend for Creamy Perfection
When you’re ready to enjoy your homemade ice cream, remove the frozen ice cream cubes from the tray and transfer them to the blender. Blend the ice cream cubes in pulses, scraping down the blender sides and pushing the cubes towards the blades as needed. If the texture is too thick, you can add a splash of plant-based milk to achieve the desired creaminess.
Table: Recommended Blender Ice Cream Recipes
| Flavor | Ingredients | Instructions |
|---|---|---|
| Classic Vanilla | Heavy cream, condensed milk, vanilla extract | Whip the cream, combine with condensed milk and vanilla, freeze. |
| Strawberry | Fresh strawberries, heavy cream, condensed milk | Puree strawberries, whip cream, combine with condensed milk and strawberry puree, freeze. |
| Mint Chocolate Chip | Heavy cream, condensed milk, peppermint extract, chocolate chips | Whip the cream, combine with condensed milk, peppermint extract, and chocolate chips, freeze. |
Step 4: Serve and Enjoy!
Once the ice cream reaches your desired texture, it’s time to serve and enjoy! You can scoop the ice cream into bowls or cones, or even use it to make milkshakes or ice cream sandwiches. Get creative with your toppings and mix-ins to personalize your homemade treat.
Variations of Blender-Friendly Ice Cream Recipes
If you’re looking to explore the world of homemade frozen desserts, blender ice cream recipes are a delicious and convenient option. With a blender, you can effortlessly whip up creamy homemade ice cream right in your own kitchen. The best part? There are endless variations and flavors to experiment with, allowing you to create unique and personalized ice cream creations.
Whether you’re a fan of classic flavors or crave something more adventurous, blender-friendly ice cream recipes have got you covered. From classic Vanilla Ice Cream with a cashew base to fruity delights like Strawberry and refreshing Coffee Ice Cream, there’s something to suit every palate. You can even try unique flavors like Rice, Pistachio, Chocolate, or Black Ice Cream for an extra special treat.
Want to take your ice cream to the next level? Customize it with mix-ins and toppings for a truly indulgent experience. Add crumbled cookies, chocolate chips, nuts, or swirls of peanut butter, almond butter, vegan caramel sauce, or strawberry jam to infuse your creations with extra flavor and texture. The possibilities are endless, so let your imagination run wild and create ice cream masterpieces that will wow your family and friends.
Benefits and Tips for Making Creamy Blender Ice Cream
When it comes to making homemade ice cream, using a blender can yield some truly delicious results. Not only is it a simple and accessible method, but it also allows you to create creamy and smooth ice cream without the need for an expensive ice cream machine. With a few tips and tricks, you can achieve amazing results right in your own kitchen.
Blender Selection and Technique
Choosing the right blender is key to achieving the perfect texture for your homemade ice cream. Look for a blender with a slow-start feature to prevent over-blending and maintain a creamy consistency. When blending your ice cream base, start with short pulses and make sure to scrape down the sides of the blender to ensure all the ingredients are well incorporated. This will help prevent any icy or grainy texture in your final product.
Choosing the Right Base
If you’re aiming for an extra creamy homemade ice cream, consider using a custard base. A custard base typically involves cooking a mixture of eggs, sugar, and milk until it thickens. This creates a rich and velvety texture in the final product. Alternatively, you can add a tablespoon of cornstarch to your ice cream base as a stabilizer. This helps prevent the formation of ice crystals and ensures a smoother consistency.
Avoiding Over-Freezing and Over-Blending
To maintain the perfect texture in your blender ice cream, it’s important to avoid over-freezing or over-blending. A high-fat cream, such as heavy cream or whipping cream, can help prevent the ice cream from becoming too hard when frozen. It’s also a good idea to chill all the ingredients and equipment before starting the process. This helps keep everything at a consistent temperature and prevents any unwanted texture changes.
With these tips in mind, you’ll be well-equipped to make the creamiest and most delicious blender ice cream at home. Get creative with flavors and mix-ins, and enjoy the satisfying process of making your own frozen treats.
| Tips for Making Creamy Blender Ice Cream |
|---|
| Choose a blender with a slow-start feature |
| Start with short pulses and scrape down the blender sides |
| Consider using a custard base or adding cornstarch for extra creaminess |
| Avoid over-freezing by using high-fat cream |
| Chill all ingredients and equipment before starting |
How to Make Dairy-Free Ice Cream in a Blender
When it comes to homemade frozen desserts, there’s no need to miss out if you’re following a dairy-free diet. With a blender-friendly approach, you can easily create delicious dairy-free ice cream right at home. Using ingredients like bananas, mangos, avocados, or full-fat coconut cream, you can achieve a creamy texture without the need for dairy products.
The process is simple. Just blend your chosen dairy-free ingredients until smooth and freeze them until they reach a solid consistency. This method is perfect for those with lactose intolerance or anyone looking for a non-dairy option. However, it’s important to avoid using fruits with a high water content, like pineapple or melon, as they can cause the ice cream to become icy.
Whether you’re lactose intolerant, vegan, or simply prefer non-dairy options, making dairy-free ice cream in a blender is a convenient and delicious way to enjoy frozen treats. Get creative with flavors and mix-ins, and customize your dairy-free ice cream to suit your tastes. With a blender and a few simple ingredients, you’ll be able to indulge in creamy, dairy-free goodness whenever you want.

Table: Dairy-Free Ingredients for Blender Ice Cream
| Ingredient | Function |
|---|---|
| Bananas | Provides creaminess and natural sweetness |
| Mangos | Adds tropical flavor and smooth texture |
| Avocados | Creates a rich and creamy base |
| Full-fat coconut cream | Offers a creamy consistency and coconut flavor |
Experiment with different combinations of dairy-free ingredients and add mix-ins like crumbled cookies, chocolate chips, or swirls of caramel or fruit sauce to enhance the flavor and texture of your dairy-free ice cream. The possibilities are endless when it comes to creating your own unique and delicious frozen desserts. Enjoy the freedom of making dairy-free ice cream in a blender and savor the creamy goodness, without the dairy.
The Many Ways to Make Ice Cream at Home
When it comes to making ice cream at home, there are numerous methods you can choose from, each with its own advantages and suitability for different preferences. Whether you have a blender, a food processor, a hand mixer, a mason jar, or an ice cream machine, you can create delicious homemade ice cream right in your kitchen.
If you prefer a quick and easy method, using a blender is a great option. Simply blend together your desired ingredients, freeze the mixture, and voila – creamy homemade ice cream is ready to enjoy. The blender method is perfect for those who don’t have an ice cream machine or want to make smaller batches.
For those who enjoy a more traditional approach, using an ice cream machine or KitchenAid attachment can result in a professional-style ice cream with a smooth texture. These machines churn the ice cream base, incorporating air and preventing ice crystals from forming. This method takes a bit more time and effort, but the results are worth it.
| Method | Advantages |
|---|---|
| Blender | Quick and easy Versatile No need for an ice cream machine |
| Ice Cream Machine or KitchenAid Attachment |
Professional-style ice cream Smooth texture Prevents ice crystals |
| Food Processor | Can handle a large volume of ingredients Versatile Can make other desserts like sorbet or frozen yogurt |
| Hand Mixer | Simple and easy Light and airy texture No need for special equipment |
| Mason Jar | Fun and interactive No special equipment required Easy to clean up |
Regardless of the method you choose, making ice cream at home allows you to customize flavors, experiment with mix-ins, and enjoy the satisfaction of creating a frozen treat from scratch. So go ahead, unleash your creativity, and indulge in homemade ice cream that is sure to delight your taste buds.
Classic French Style vs. Easy Philadelphia Style Ice Cream
When it comes to making homemade ice cream, there are two popular styles that often come to mind: Classic French Style and Easy Philadelphia Style. Each style has its own unique characteristics and flavor profiles, making them perfect for different occasions and taste preferences.

French style ice cream, also known as custard-based ice cream, is made with a rich and velvety base that includes eggs. This style is known for its luxurious texture and complex flavors. The addition of eggs gives the ice cream a creamy and smooth consistency, making it perfect for indulgent flavors like chocolate ganache or salted caramel. French style ice cream tends to have a more pronounced and rich taste, making it a favorite among ice cream connoisseurs.
On the other hand, Philadelphia style ice cream is a simpler and lighter version that does not include eggs in its base. This style is known for its pure and delicate flavors, allowing ingredients like fresh fruits or pure extracts to shine. Philadelphia style ice cream is perfect for those who prefer a lighter and more refreshing treat, making it ideal for flavors like strawberry, mint chocolate chip, or lemon sorbet.
| Classic French Style Ice Cream | Easy Philadelphia Style Ice Cream |
|---|---|
| Rich and creamy texture | Light and refreshing consistency |
| Egg-based custard | Egg-free base |
| Intense and complex flavors | Pure and delicate taste |
Both styles of ice cream have their own merits and can be enjoyed for different occasions. Whether you’re in the mood for a decadent dessert or a refreshing treat, French style and Philadelphia style ice cream have you covered. So why not try making both of these delicious homemade ice creams and discover your favorite?
Simple Three-Ingredient Ice Cream Recipe in a Blender
Who doesn’t love homemade ice cream? With a blender, you can create delicious frozen treats in no time. This easy ice cream recipe requires just three simple ingredients: heavy cream, condensed milk, and vanilla extract. The best part? No ice cream machine or churning required!
To make this simple three-ingredient ice cream, start by chilling all the ingredients beforehand. This helps to achieve a smooth and creamy texture. In a blender, whip the heavy cream until it thickens and holds stiff peaks. Then, gently fold in the condensed milk and vanilla extract until well combined.
Pour the mixture into a freezer-safe container and freeze for at least 12 hours, or until set. Once ready, let the ice cream soften for a few minutes before scooping and serving. The result is a rich and creamy homemade ice cream that will delight your taste buds.

| Ingredients: | Instructions: |
|---|---|
| – 2 cups heavy cream | 1. Chill all the ingredients. |
| – 1 can condensed milk | 2. Whip the heavy cream in a blender until thick. |
| – 1 teaspoon vanilla extract | 3. Gently fold in the condensed milk and vanilla extract. |
| 4. Pour the mixture into a freezer-safe container. | |
| 5. Freeze for at least 12 hours until set. | |
| 6. Let the ice cream soften for a few minutes before serving. |
Experiment with different flavors by adding mix-ins like chocolate chips, crushed cookies, or fruit puree. The possibilities are endless, and you’ll have a creamy and refreshing dessert to enjoy whenever you crave a cool treat.
Egg-Free Custard Base Ice Cream Recipe in a Blender
When it comes to making homemade ice cream, the possibilities are endless. With a blender and a few simple ingredients, you can create delicious frozen treats right in your own kitchen. One popular variation is egg-free custard base ice cream, which offers a creamy and smooth texture without the need for eggs. This recipe is perfect for those with dietary restrictions or allergies, and it still delivers on taste and richness.
Creating an egg-free custard base ice cream is surprisingly easy with the help of a blender. To begin, gather your ingredients: cornstarch or custard powder, sugar, vanilla extract, milk, and cream. Start by cooking the cornstarch or custard powder with sugar and milk to create a thickened custard base. Once cooled and chilled, whip the custard with the cream in your blender until smooth and well combined.
Pour the mixture into a container and freeze it for at least 12 hours to allow it to set. The result is a velvety and creamy ice cream with a luxurious texture. If your ice cream becomes over-frozen, you may need to whip it or break up any ice crystals before refreezing. Serve and enjoy your egg-free custard base ice cream on its own or pair it with your favorite toppings or mix-ins for added flavor and fun.
| Ingredients | Instructions |
|---|---|
| 2 tablespoons cornstarch or custard powder | In a saucepan, combine the cornstarch or custard powder with sugar and milk. Cook over medium heat, stirring constantly, until the mixture thickens. Remove from heat and let it cool. |
| 1/2 cup sugar | |
| 1 teaspoon vanilla extract | Once the custard base has cooled, transfer it to a blender along with the cream. Blend until smooth and well combined. |
| 2 cups milk | |
| 2 cups heavy cream | Pour the mixture into a container or loaf pan and freeze for at least 12 hours, or until set. |
Now you can enjoy homemade egg-free custard base ice cream whenever you crave a cold and creamy treat. With its smooth texture and delicious flavor, this blender recipe is a fantastic option for those looking for an egg-free alternative without compromising on taste.
Making Ice Cream with a Hand Mixer (Alternative Method)
When it comes to making homemade ice cream, there are several methods to choose from. While using a blender is a popular choice, another alternative method that can be equally effective is making ice cream with a hand mixer. This method is perfect for those who don’t have a blender or prefer a different approach. With a few simple steps, you can create delicious homemade ice cream using a hand mixer.
To make ice cream with a hand mixer, start by gathering your ingredients and chilling them beforehand. Once the ingredients are chilled, combine them in a bowl and use the hand mixer to whip the mixture until it becomes light and fluffy. This step helps incorporate air into the ice cream, resulting in a creamy texture. Next, transfer the mixture to a freezer-safe container and freeze it for at least 12 hours or until it reaches the desired consistency.
While the process may require a bit more effort and time compared to using a blender, making ice cream with a hand mixer allows you to have more control over the texture and consistency of the final product. It’s a great way to get creative and experiment with different flavors and mix-ins. So, if you’re looking for an alternative method to make homemade ice cream, give the hand mixer a try and enjoy the delicious results!
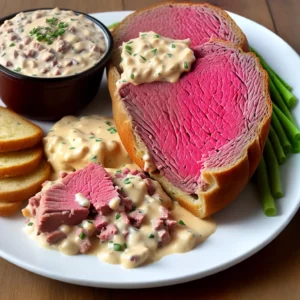
Disclaimer: Results may vary. The image above is for illustrative purposes only.
Making Ice Cream in a Mason Jar (Alternative Method)
If you’re looking for a fun and simple way to make homemade ice cream, look no further than a mason jar. This alternative method is perfect for those who don’t have a blender or prefer a hands-on approach. With just a few ingredients and a little bit of shaking, you can create a delicious treat right in your own kitchen.
To make ice cream in a mason jar, you’ll need a mason jar with a tight-fitting lid, chilled heavy cream, condensed milk, and vanilla extract. Simply combine the ingredients in the jar, seal it tightly, and shake vigorously for a few minutes. The mixture will double in size as you shake, creating a creamy and smooth ice cream base.
Once you’ve finished shaking, you can add your favorite mix-ins like crumbled cookies, candies, or fruit. Then, seal the jar again and freeze it for a few hours until the ice cream is firm. The result is a delicious and customizable treat that you can enjoy right from the jar.
So why not give this mason jar method a try? It’s a fun and easy way to make homemade ice cream without any fancy equipment. Plus, it’s a great activity to do with kids or friends. Get creative with your flavors and mix-ins, and enjoy the sweet rewards of your homemade creation.
Benefits of Making Ice Cream in a Mason Jar
- No blender or special equipment required
- Easy and fun activity for all ages
- Customizable flavors and mix-ins
- Quick and convenient method
Recipe: Mason Jar Ice Cream
| Ingredients | Instructions |
|---|---|
| 1 cup chilled heavy cream | 1. Combine all ingredients in a mason jar. |
| 1/2 cup condensed milk | 2. Seal the jar tightly. |
| 1 tsp vanilla extract | 3. Shake vigorously for a few minutes until the mixture doubles in size. |
| Mix-ins of your choice (optional) | 4. Add mix-ins if desired. |
| 5. Seal the jar again and freeze for a few hours until firm. |
Tips for Customizing Homemade Ice Cream Flavors
When it comes to homemade ice cream, the possibilities are endless. One of the greatest joys of making your own ice cream is the ability to customize the flavors to suit your personal preferences. Whether you’re a fan of classic combinations or enjoy experimenting with unique and unexpected flavors, the blender method gives you the freedom to create delicious frozen treats that are truly one-of-a-kind.
To get started, think about your favorite store-bought ice cream flavors and use them as inspiration. You can easily recreate popular flavors like chocolate, strawberry, or mint chip with a few simple ingredients and the power of your blender. But don’t stop there – let your creativity soar and try combining different ingredients to develop your own unique signature flavors.
One way to create custom flavors is by adding mix-ins. Crumbled cookies, candy pieces, brownie chunks, or swirls of salted caramel or fruit jam can take your homemade ice cream to the next level. You can also experiment with different extracts, like almond or coconut, for a hint of exotic flavor. And don’t forget about toppings! From whipped cream and sprinkles to hot fudge or fresh fruit, a well-selected topping can elevate your homemade ice cream to a gourmet dessert experience.
So, grab your blender and let your imagination run wild. With the simple blender method and these customization tips, you can create homemade ice cream flavors that will impress your friends and family. Whether you’re looking for an easy ice cream recipe for a casual summer gathering or want to indulge in a decadent dessert, the blender method allows you to achieve creamy homemade ice cream with endless flavor possibilities. Get ready to embark on a delicious ice cream adventure!
Conclusion
In conclusion, making homemade ice cream in a blender is a simple and convenient method that yields delicious results. With just a few basic ingredients and a blender, you can create creamy and flavorful ice cream in the comfort of your own home. Whether you prefer classic flavors like vanilla or want to get adventurous with unique combinations, the blender method allows for endless customization options.
The versatility of the blender technique is a key advantage. Not only can you make traditional dairy-based ice cream, but you can also easily create dairy-free and vegan options by using plant-based milk or fruit as substitutes. This makes it a great choice for individuals with dietary restrictions or preferences.
By making your own ice cream at home, you have full control over the ingredients, ensuring a healthier and tastier treat. Say goodbye to store-bought options packed with preservatives and additives. With homemade ice cream, you can savor the pure and natural flavors, knowing exactly what goes into every scoop.
So why not give the blender method a try? It’s a fun and rewarding way to satisfy your ice cream cravings. Experiment with different flavors, mix-ins, and toppings to create your own signature creations. Get creative and let your imagination run wild. Homemade ice cream has never been easier or more delicious.
FAQ
Can I make ice cream in a blender?
Yes, you can make ice cream in a blender. It’s a simple and convenient method that yields creamy homemade ice cream.
What tools do I need to make ice cream in a blender?
All you need is an ice cube tray and a blender.
What type of ice cream can I make in a blender?
You can make any homemade ice cream recipe in a blender. It’s a versatile technique that works with various flavors and mix-ins.
How does the blender method compare to using an ice cream maker?
The blender method can yield results that are similar to using an ice cream maker, but without the need for additional equipment.
How do I make ice cream in a blender?
To make ice cream in a blender, you pour the ice cream base into an ice cube tray and freeze it overnight. The next day, blend the frozen ice cream cubes in a blender until the desired texture is reached.
Can I adjust the consistency of the ice cream made in a blender?
Yes, you can add a splash of plant-based milk to achieve the desired consistency.
What flavors of ice cream can I make using the blender method?
You can make a variety of flavors, including Vanilla, Strawberry, Coffee, Rice, Pistachio, Chocolate, and more. The possibilities are endless!
How can I customize the flavors of my blender ice cream?
You can add mix-ins like crumbled cookies, chocolate chips, nuts, or swirls of peanut butter, almond butter, caramel sauce, or fruit jams to create unique flavors.
Can I make dairy-free ice cream in a blender?
Yes, you can make dairy-free ice cream in a blender by using ingredients like bananas, mangos, avocados, or full-fat coconut cream as substitutes for dairy.
Are there alternative methods for making homemade ice cream?
Yes, you can make ice cream using a food processor, hand mixer, Mason jar, plastic bag, or an ice cream machine or KitchenAid attachment. Choose a method based on your preference and available equipment.
What is the difference between French style and Philadelphia style ice cream?
French style ice cream contains eggs, resulting in a richer and more complex flavor. Philadelphia style ice cream is egg-free and has a lighter and more delicate taste.
Can I make a simple three-ingredient ice cream in a blender?
Yes, you can make a delicious ice cream using just heavy cream, condensed milk, and vanilla extract in a blender.
How can I make an egg-free custard base ice cream in a blender?
You can make an egg-free custard base ice cream by cooking cornstarch or custard powder with sugar and milk, cooling the mixture, and then whipping it with cream in a blender.
Is it possible to make ice cream with a hand mixer?
Yes, you can make ice cream using a hand mixer by whipping the ingredients in a bowl until light and fluffy, and then freezing the mixture until set.
Can I make ice cream in a Mason jar?
Yes, you can make ice cream in a Mason jar by combining the ingredients, shaking them until doubled in size, adding mix-ins, and then freezing the jar until the ice cream is ready to enjoy.
How can I customize the flavors of my homemade ice cream?
You can customize your homemade ice cream by adding various mix-ins and toppings like crumbled cookies, candies, brownie chunks, or fruit swirls.
Source Links
- https://itdoesnttastelikechicken.com/how-to-make-ice-cream-in-a-blender/
- https://www.kitchenaid.com/pinch-of-help/countertop-appliances/how-to-make-ice-cream-in-a-blender.html
- https://www.indianhealthyrecipes.com/ice-cream-recipe-no-ice-cream-maker/
Related Recipes:
 How to Make Greek Yogurt (No Special Equipment)
 How to Make Nice Cream? (Perfect Every Time!)
 How to Make Homemade Croutons? (Perfect Every Time!)
 How to Freeze Bananas? (Perfect Step-By-Step Guide)
 How to Make a Smoothie? (Perfect Every Time!)
 How to Eat Avocado? (Step-By-Step Guide)
 How to Make Homemade Popsicles? (Perfect Every Time!)
 Passion-Fruit Ice Cream


